Supercharge your Dispatch Console, and Interact with Custom Actions, using Custom JavaScript
Related References:
- Customize the Field Service Dispatcher Console
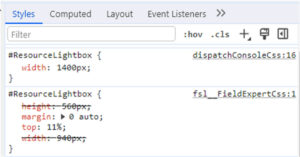
- Salesforce Field Service – Dispatch Console Custom CSS
Background
As discussed in Salesforce Field Service – Dispatch Console Custom CSS, the Salesforce Field Service Dispatch Console offers some lesser known customization hooks that can be quite useful. We previously looked at how to style the Console using custom CSS, and in this edition we’ll look at how to create far more powerful solutions using a custom JavaScript file.
I’m burying the lede a bit here, as the example we’ll look at allows for communication between a custom action/component and the out of the box Dispatch Console itself, which opens up a host of new options for improving user experience. Without using this ‘External JS’ offering in Field Service Settings, we’re prevented from interacting with the standard DC from a custom action, as cross-origin blocks direct interaction and posting a message to the parent is ineffective without a listener. Using an ‘External JS’ file allows us to add that listener and perform actions accordingly. Thanks to Salesforce Product team as well for helping to work through an issue I had along the way.
To demonstrate this capability, we will look at a dummy custom action that passes a value from the associated modal to the parent component (the standard Dispatch Console), closes the modal, fills the Service Appointment search field, and executes the resultant search against the Service Appointment list. The use case against which I originally started investigating this possibility was that users wanted a more powerful search tool when they didn’t know the SA number and/or didn’t have access to further filters in the Service Appointment List View.
That example aside, the purpose here is to demonstrate how the custom JavaScript file addition available in Field Service configuration allows us to add customizations, and capture associated selections or events from those components, to drive behavior on the standard Console itself.
Create Simple Custom Component
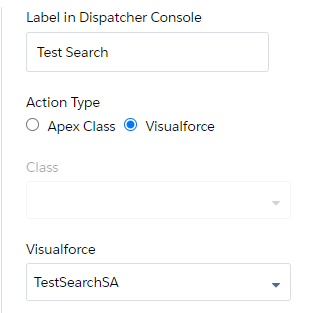
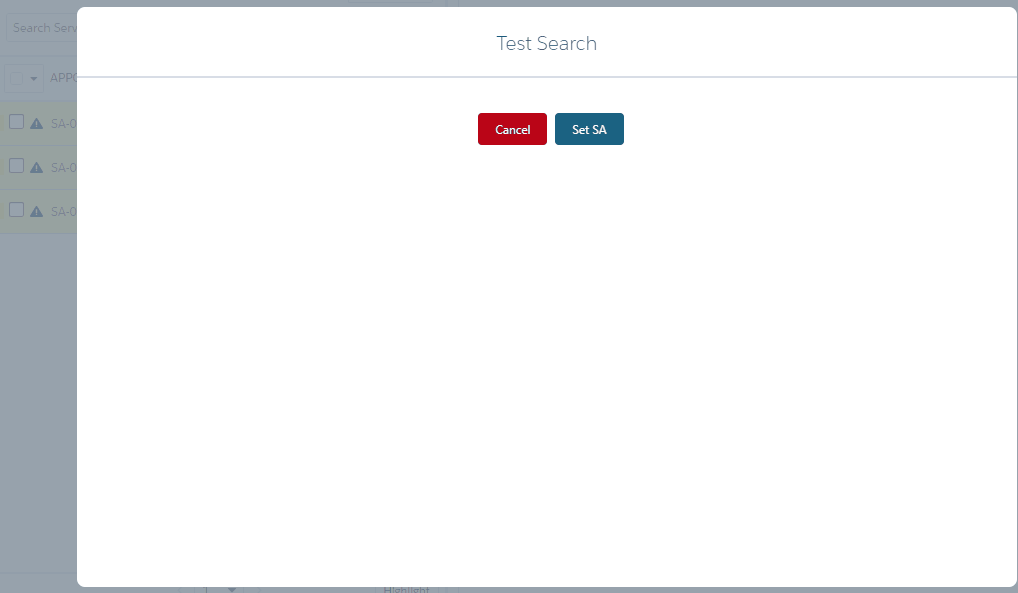
As the purpose of this post is to show the JavaScript file and behavior, we’ll move quickly through this portion and keep things simple. Here we have created a small VF page that can be used as a custom action for the Dispatch Console. It offers a couple of buttons, including one to close the modal, and one to pass a hardcoded Service Appointment selection to the parent component. In a real-life scenario we’d of course create an actual search component that fetches and dynamically passes the SA value to the parent component.
Along the lines of a real-life solution, note that while working through this, I came across what seems to be a full featured Service Appointment search solution from Asperii. I cannot speak to the technical implementation, but if you’re looking for what appears to be a powerful plug-and-play option specific to Service Appointment search on Dispatch Console, you may want to reach out to them.
<apex:page docType="html-5.0" lightningStylesheets="true" cspHeader="false">

    <style>
    	body{
        	text-align: center;
        }
    </style>

    <script>
        //standard close lightbox function
        function closeparent(){
            parent.postMessage('closeLightbox','*');
        }

        //function triggered on button press.
        function setSA(value){
            const myMessage = {
                type:  'customTest',
                sa:  value //in real use case we dynamically pass this from component.
            }
            parent.postMessage(myMessage,'*');
            //close the lightbox.
            this.closeparent();
        }
    </script>

    <apex:slds/>
    <div class="slds-scope">
        <apex:form>
            <br/>
            <apex:commandButton value="Cancel" onclick="closeparent()"
                                styleClass="slds-button--destructive"/>
            <apex:commandButton value="Set SA" onclick="setSA('SA-0000914501')"
                                styleClass="slds-button--brand"/>
        </apex:form>
    </div>
</apex:page>
Establish the Custom Action
Now we add the VF page as a custom action as per standard method. Go to ‘Field Service Settings’ => ‘Dispatcher Console UI’ => ‘Custom Actions’, and select the launch point for the custom action. We will use ‘Mass Actions’, which means it will show under ‘Actions’ next to Appointment List. Select the VF page created previously, and give it a label for the Dispatch Console. Save.
Create the Custom JavaScript File
Now for the fun part. Here we create the JavaScript file to be used to handle the event fired from the custom action. In the file, we need to add our own event listener to the window in order to pick up the message posted from the custom action. This lets us drive behaviors within the standard Dispatch Console page based on inputs taken from the custom action.
As the Dispatch Console will be dispatching its own events, we first need to check the message payload for a qualifying characteristic so that we can act only on the events we care about – those sent from the custom action. To accomplish this, we check that the ‘type’ of ‘customTest’ sent from the custom action message is found, and enter the remainder of our logic if so. For our example, we’re going to pass the Service Appointment number to the Service Appointment Search Field, and imperatively fire the onchange() event so that the search is executed without user intervention. We can also hit the ‘Search All Records’ button if the scenario calls for it, through locating and imperatively ‘clicking’ that button (I’ve commented that out in this example). Note that there are countless other outcomes that can be achieved using a similar approach, by targeting other fields, actions, etc…time to get creative!
//JS file for custom control of standard Dispatch Console.
window.addEventListener('message', (event) => {
//get event data
let data = event.data;
//check event type - if coming from popup then we process
if(data.type == 'customTest'){
//target SA search field as an example.
let searchField = document.getElementById('TaskSearchFilterInput');
//set value in SA search field
searchField.value = data.sa;
//create onchange event and fire programmatically as standard page does not recognize.
const e = new Event('change');
searchField.dispatchEvent(e);
//For 'Search All Records' button push when horizon or other criteria not met.
//document.getElementById('SearchOnServer').click();
}
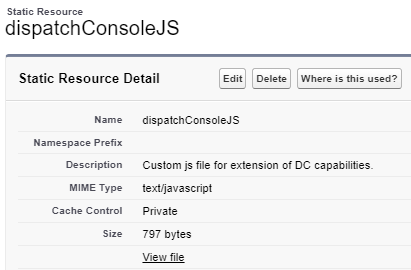
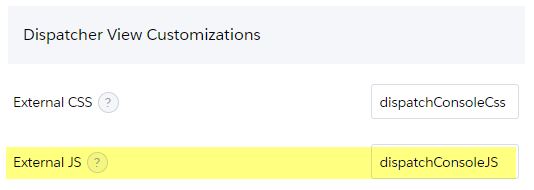
});Make sure to save the text field and give it an appropriate name – ‘dispatchConsoleJS’ for this example.
Add JavaScript File as Static Resource
For the final step we go to Setup => Static Resources, and create a new Static Resource. Here we’ve given it the same name as that of the file, and uploaded the JS file to the Static Resource.
Add External JS Reference in Field Service Settings
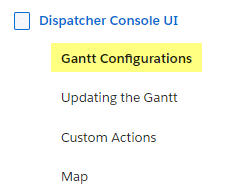
For the final step, we navigate to the ‘Field Service Settings’ app and select ‘Gantt Configurations’
Under ‘Dispatcher View Customizations’, and ‘External JS’, we enter the name of the Static Resource created earlier. Save.
Trying It Out
Now we’re ready to open the Dispatch Console and check out what we’ve accomplished (if anything). I’ve created a few Service Appointments that show up in the List View – we’re going to use the custom action to filter these via Search.
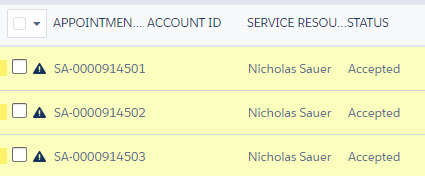
Launch the custom action from Dispatch Console, and click the ‘Set SA’ button. The Service Appointment list will be automatically filtered as the SA number from the custom component is plugged into the Search field, the onchange() event initiated by the event listener, and the search executed.
Success!
Wrapping Up
Thanks for reading, and hopefully this helps you come up with additional ideas to supercharge the Dispatch Console experience!