
Use Service Appointment Bundling to schedule multiple Service Appointments at once
Related Posts:
- Part 1, Appointment Bundling Setup **You are Here**
- Part 2, Appointment Bundling – Automated Bundling
- Part 3, Appointment Bundling – Live Bundling
- Part 4, Appointment Bundling – Custom Configurations
Related References:
- Salesforce Help Article on Bundling Setup
- Salesforce Help Article on Bundling Permissions
- Appointment Bundling API
Scenario
There are a number of potential scenarios where bundling Service Appointments may be useful. Let us take a hypothetical where there are multiple service jobs to be performed at a large apartment complex. One option would be to have 20 separate Service Appointments – 1 for each of the individual jobs. This creates the need to schedule each of these Service Appointments separately, which is a hassle if the same resource is providing the service at the same location over the same period of time. Instead we can use Service Appointment bundling to retain those 20 separate Service Appointments, but group them together for scheduling all the jobs at once.
Service Appointment bundling allows for a great deal of complexity to meet business needs. We will focus on the basics of setting up the capability and doing a simple bundling of a few Service Appointments. I’ll likely dive deeper into some of the automation functionality in future articles.
Service Appointment Bundling Setup
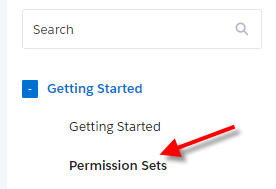
Navigate to ‘Field Service Settings’ app. In ‘Getting Started’, click on ‘Permission Sets’.
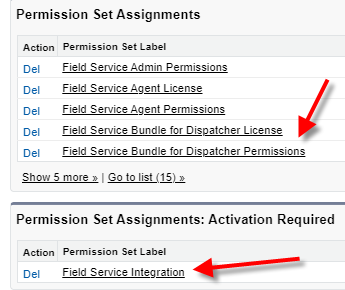
Update and / or Create each Permission Set. The critical ones for bundle ‘FIELD SERVICE ADMIN’, ‘FIELD SERVICE BUNDLE FOR DISPATCHER’ and ‘FIELD SERVICE INTEGRATION’.

Navigate to Users to whom the permissions should be assigned, or to the Permission Sets themselves and Manage Assignments. Note that ‘Field Service Integration’ will be under Activation Required Permission Set. I’m working under the assumption that appropriate users are already assigned all of the Object-level and Field-level permissions to interact with Work Orders, Service Appointments, and Skills. If this isn’t the case in your org, please add those permissions as needed.
There are a few additional actions required to complete setup.
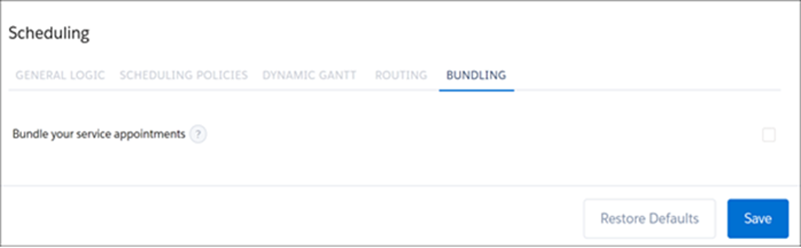
First, navigate back to ‘Field Service Settings’, access ‘Scheduling’ and then ‘Bundling’ subtab. Check the checkbox ‘Bundle your service appointments’ to enable Bundling.
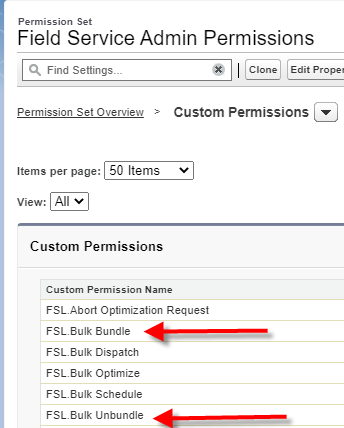
Next, navigate to the Field Service Admin Permission Set, and go to ‘Custom Permissions’. Make sure at least the following custom permissions are included: FSL.Bulk Bundle, FSL.Bulk Unbundle, FSL.Gantt and List Bundle and Unbundle, FSL.Service List View – Exclude Bundle Members. Example below:
Another thing we need to check here is if the Remote Site Settings are updated to allow for the bundling service to run. The managed package will have added these Remote Sites, but they can be inactive by default. If this step is not done, that’s OK as you’ll get an error when Bundling on the Dispatch Console. The error message will give the exact Remote Site being called which is not currently active.

Lastly, for the Profile used by System Admins for setup of SFS, we need to change the tab settings for ‘Appointment Bundling Policies’ and ‘Appointment Bundling Configs’ objects. Navigate to the Profile, and then to Object Settings. Navigate to these objects and change the Tab Visibility to ‘Default Off’ so that the objects can be accessed.

At this point we are ready to either use the Default Bundling Policy that has been created on our behalf, or to begin creating custom configurations. Note that the step to enable tab access for Appointment Bundling Policies and Appointment Bundle Configs allows us to access these objects through the App launcher, and we can navigate to all related objects from there. Available setup options here include automated and manual settings, what SAs can be bundled, how SAs within a bundle are sorted, and how Bundle SAs inherit values from their component SAs. Please refer to the documentation for full list of options as more complex setups are outside the scope of this particular post.
Manual Bundling
Let’s check out manual bundling under the default policy. I’ve created a few Service Appointments under a Service Territory that I have selected on the Dispatch Console, so that the SAs appear in the Appointment List.
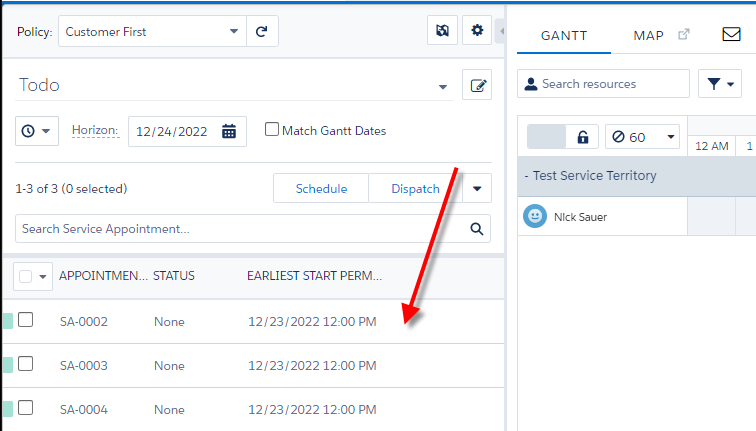
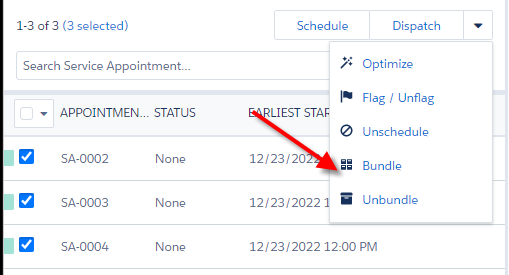
Select the checkbox next to each Service Appointment, or use the Select All option from the pulldown above. Then use the Action pulldown to select ‘Bundle’.
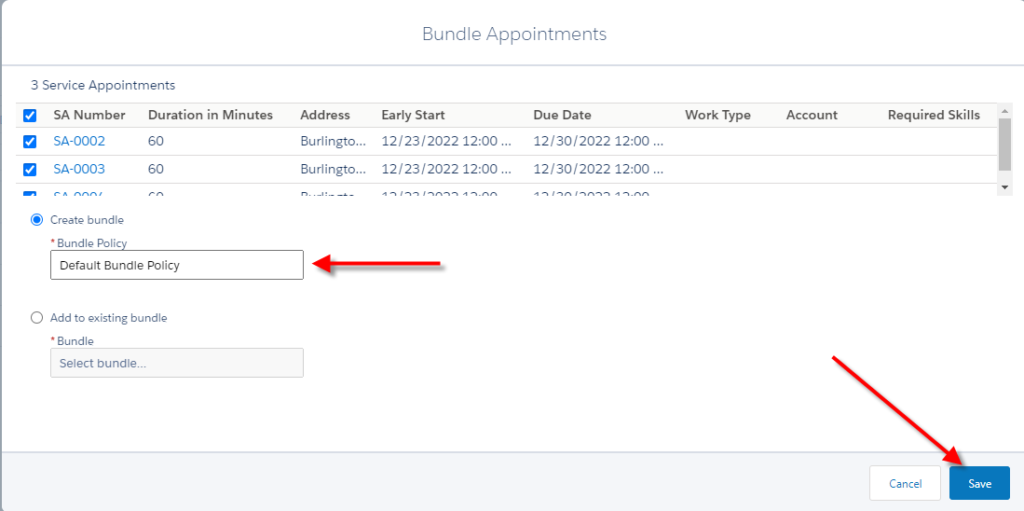
The Appointment Bundling window will now be shown, which allows selection of the SAs, and then creation of a new Bundle (or addition of these SAs to an existing Bundle). For our use case, we’ll use the Default Bundle Policy and then click on ‘Save’.
This will kick off the bundling process. A toast message will appear when the Service Appointments have been added to the newly created parent Service Appointment. The envelope icon will also display the results.
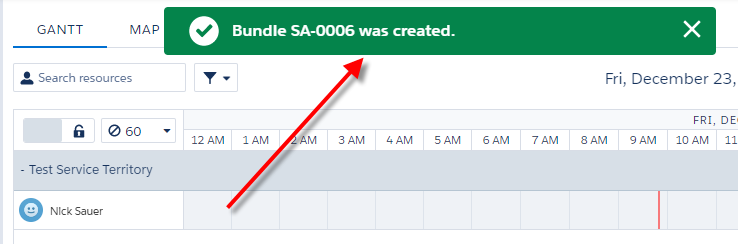
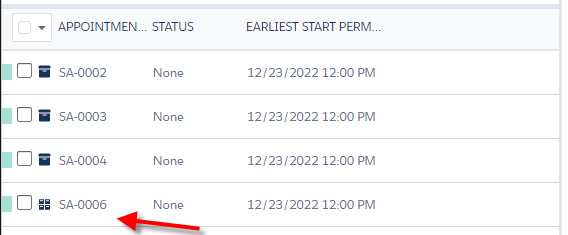
What we will now see in the Appointment List is that there is a new Bundle SA-0006 (notice the icon difference). This Bundle SA can now be scheduled, but the children cannot…instead, scheduling the Bundle will schedule the associated children.
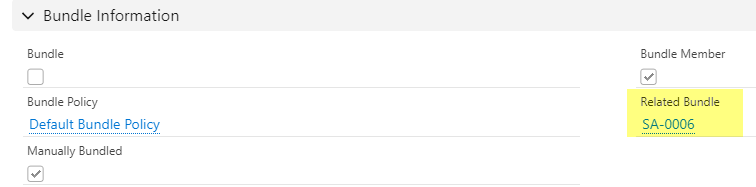
If we navigate to one of the child Service Appointments, and have the appropriate fields showing on the layout, we’ll see the Bundling information presented, including the Related Appointment (the Parent).
From the Parent Bundle, we can see similar information, including all of the child Service Appointments as represented in Bundle Member Service Appointments (don’t forget to add the Related List).

Scheduling the Bundle Appointment
Back on the Dispatch Console, we’ll now schedule the bundle by dragging and dropping on a Service Resource. Doing so will cause the Bundle Members to be removed from the Appointment List. Just as with a single Service Appointment, the Bundle Appointment can be moved around the Dispatch Console as needed.
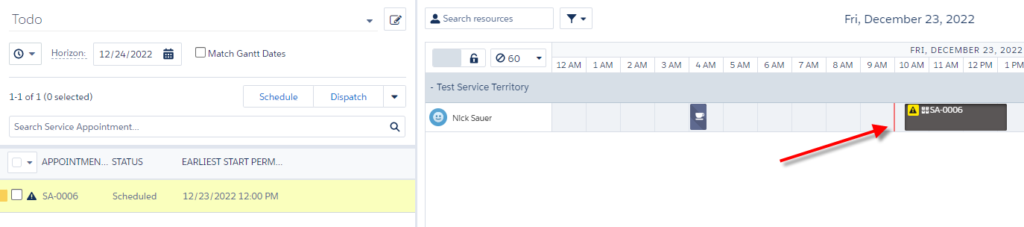
Note that clicking on the Scheduled Bundle will show the Bundle Members in the lightbox for easy access on the Dispatch Console.

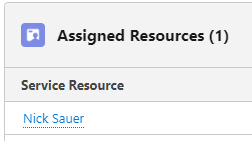
If we navigate to the Bundle Service Appointment, we see that the Assigned Resource has been created against the Service Resource as expected.
Unbundling
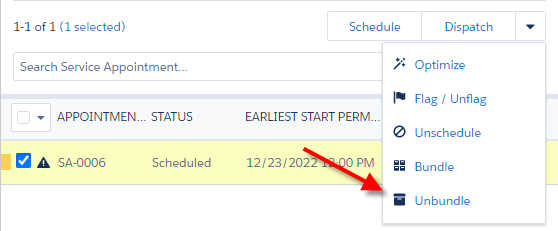
To unbundle the Service Appointment, we need to select the Bundle Appointment, go to Actions and click on ‘Unbundle’.
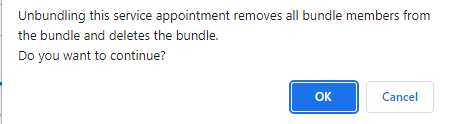
A pop up is given warning that all bundled Service Appointments will be removed and the Bundle Appointment itself will be deleted. Click OK.
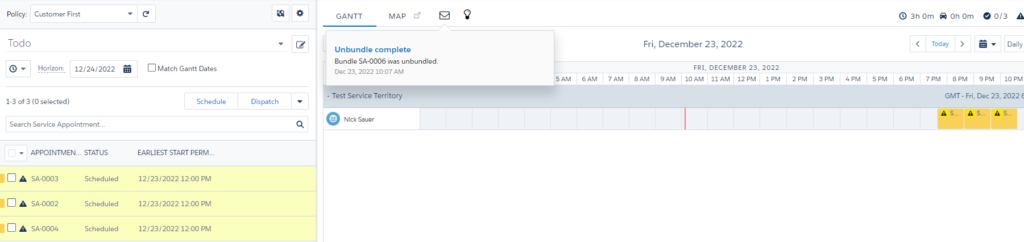
The individual Service Appointments will now show again, and the Bundle Appointment will be deleted. If the Appointments are already scheduled they’ll show individually on the Gantt as below. Now we’re back where we started, and can deal with the Service Appointments individually.
Wrapping Up
Thanks for reading. There is a lot of ground to cover with Service Appointment Bundling, and these are just the basics. Hopefully this helps get you started down the path if you haven’t already!


[…] Part 1, Appointment Bundling Setup […]
[…] Part 1, Appointment Bundling Setup […]
[…] Part 1, Appointment Bundling Setup […]
[…] Salesforce Field Service – Appointment Bundling Setup […]
[…] Appointment Bundling Deep Dive Series […]